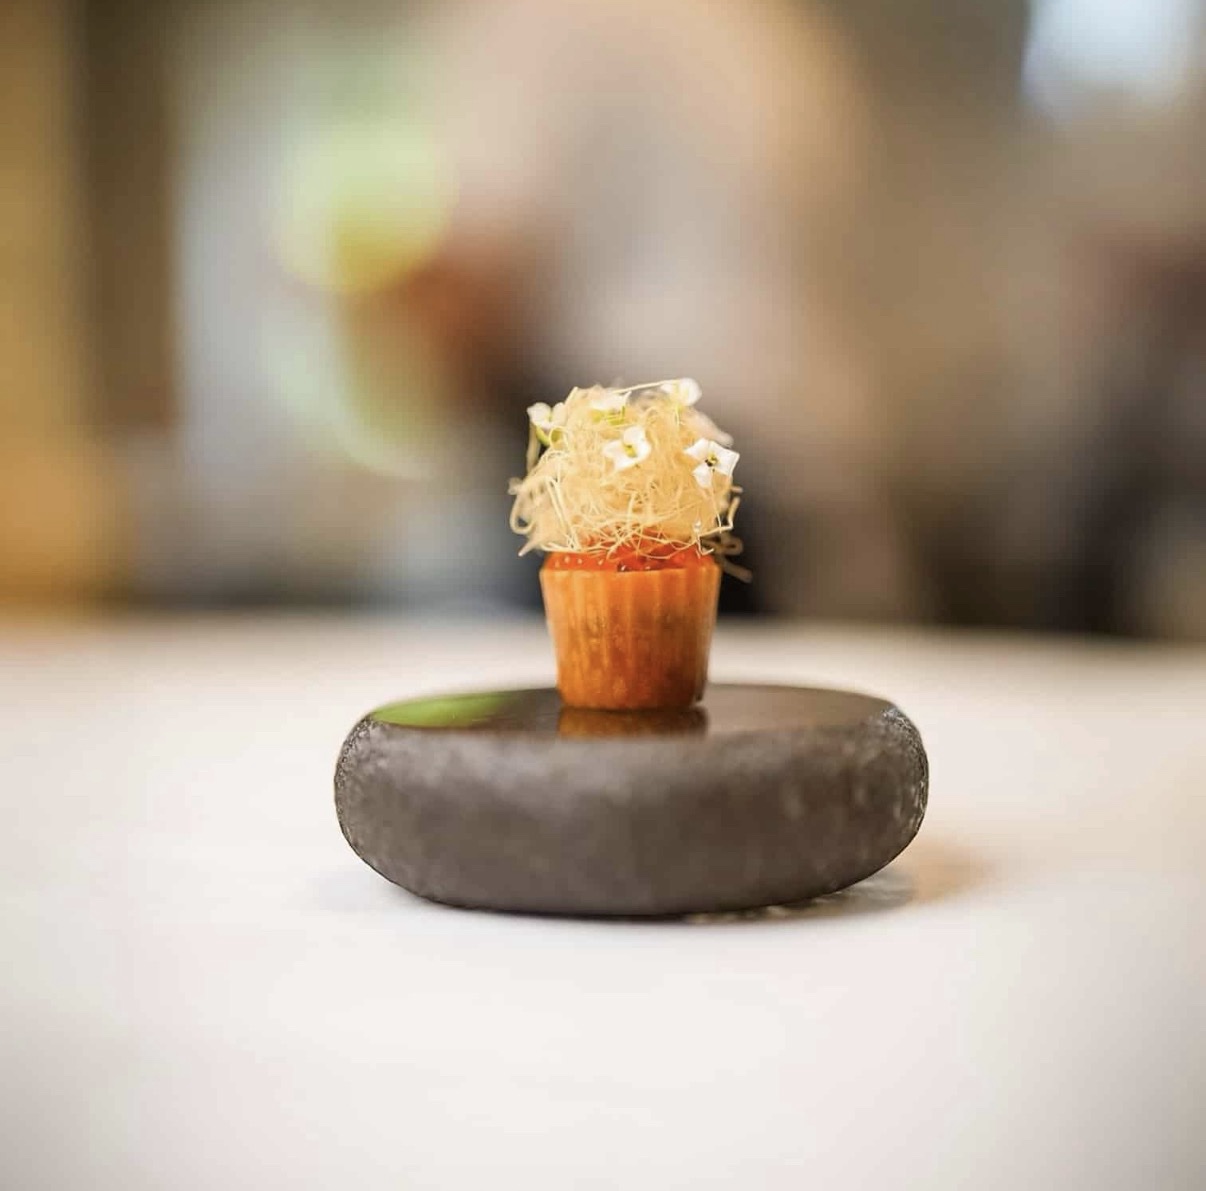
If you are looking for the full croustade recipe, including batter and step-by-step instructions, read our complete guide HERE!
Step 1:
Use Batter at the Right Temperature
Creating a perfectly crisp croustade is not about luck — it is about control. Temperature, timing, and technique all play a role in whether your result is light and delicate or heavy and uneven.
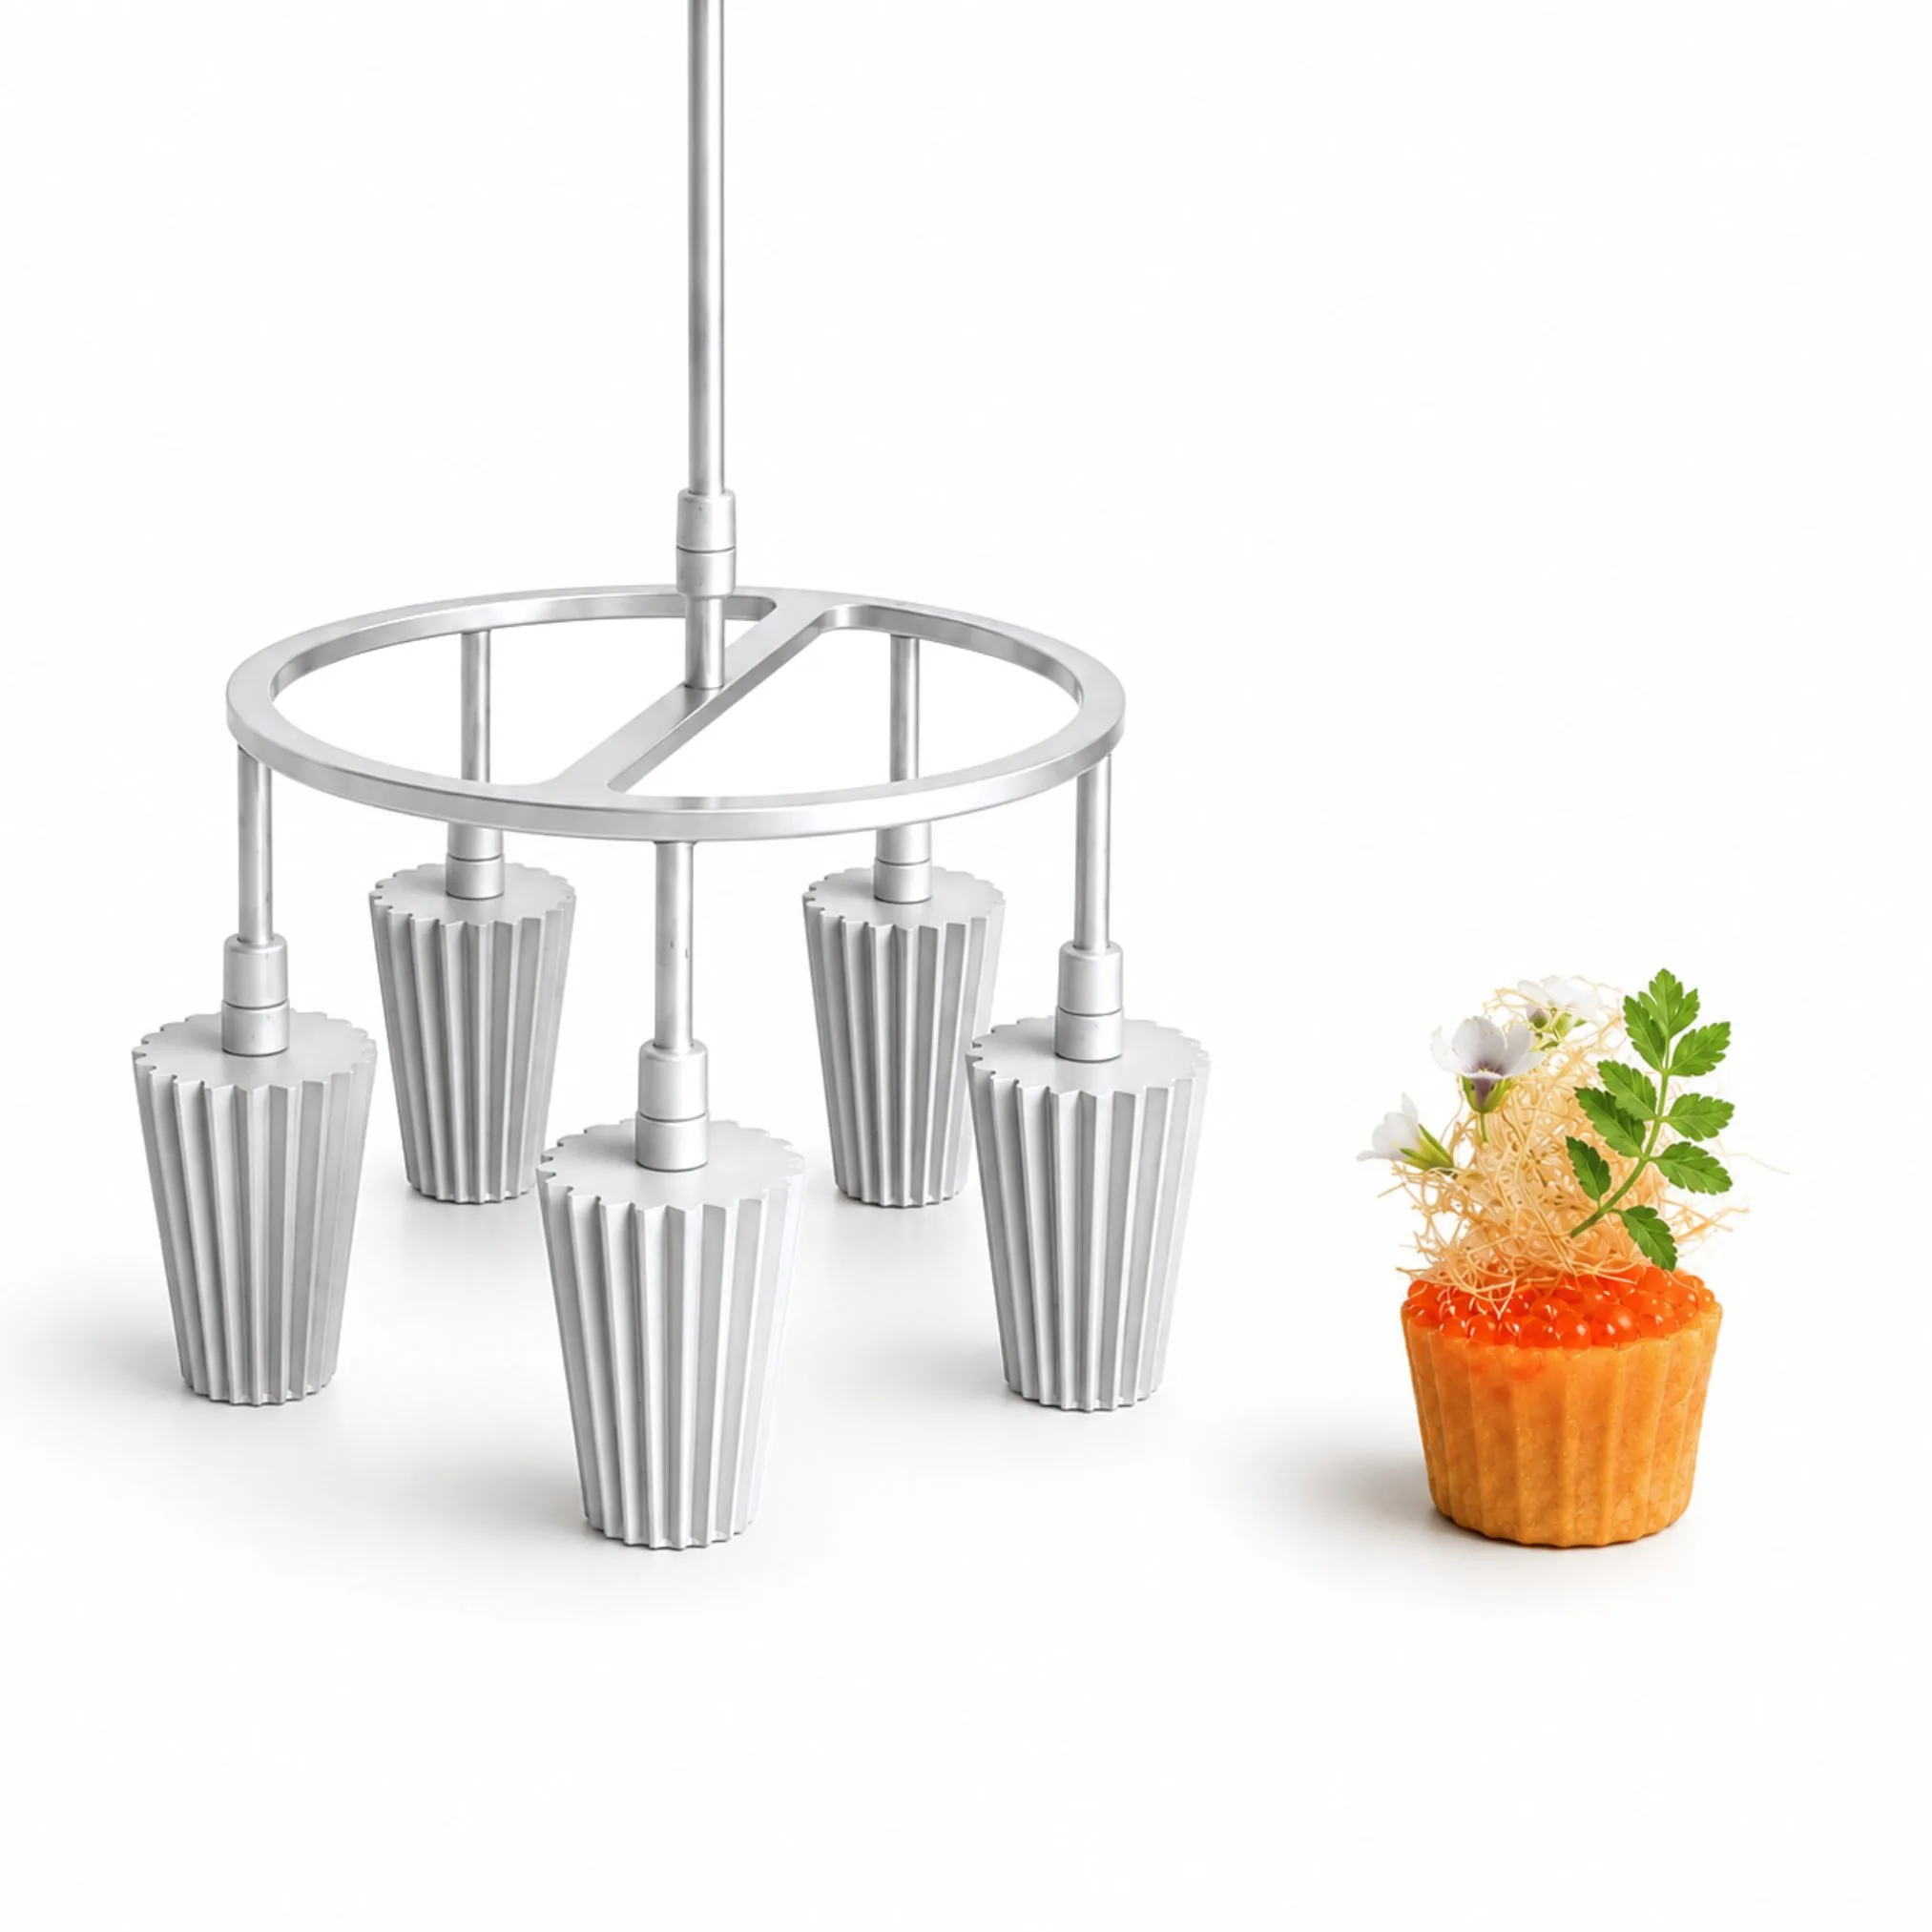
This guide walks you through the exact process used in professional kitchens to get consistent, clean results with your professional croustade irons
Step 2:
Use Batter at the Right Temperature
Always work with room temperature batter.
Cold batter creates instability. It can lead to uneven coating, poor structure, and difficulty releasing the croustade from the mold. A stable batter temperature gives you better control and a more consistent result.
Step 3:
Remove Excess Oil Before Dipping
When lifting the iron from the oil, gently shake off excess oil.
Too much oil on the surface will prevent the batter from forming a clean, thin layer. The goal is a light, even coating — not a thick, uneven shell.
Step 4:
Dip and Let the Batter Set
Dip the heated iron into the batter, making sure not to submerge it completely over the top edge.
After dipping, allow the batter to rest briefly before returning it to the oil. This short moment lets the batter begin setting, which improves structure and reduces the risk of it slipping off too early.
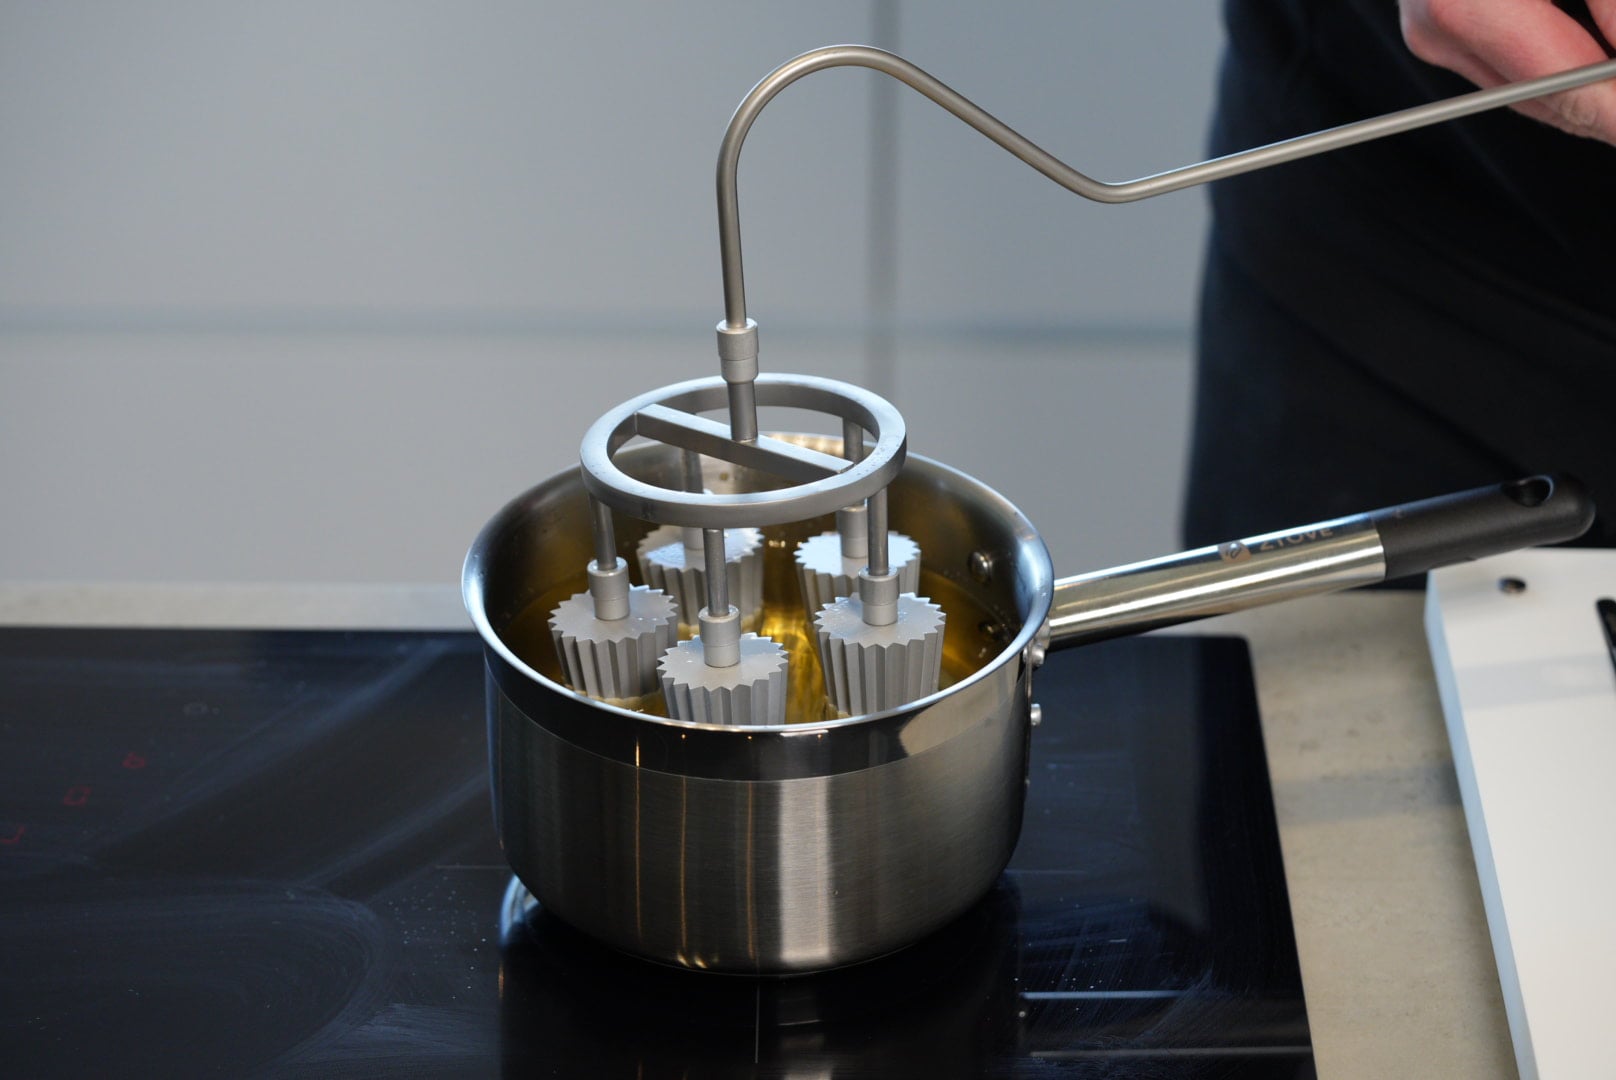
Step 5:
Control Your Oil Temperature
Oil temperature is where most inconsistencies happen.
- If the batter releases too quickly and loses its shape, the oil is too cold
- If it browns too fast and becomes hard or brittle, the oil is too hot
You are aiming for a steady temperature where the croustade slowly develops structure and color.
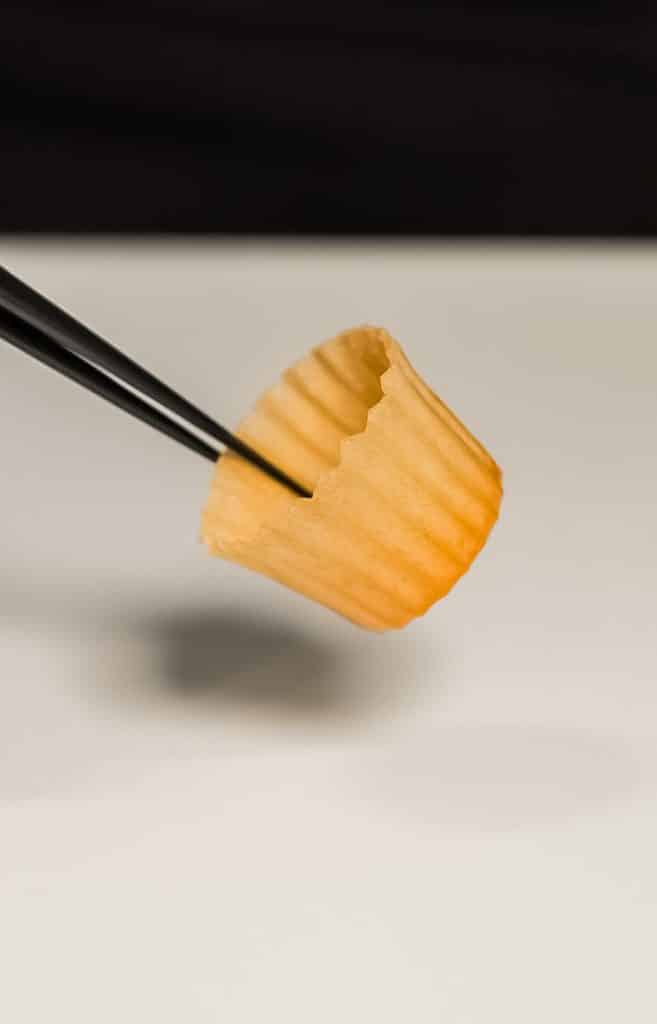
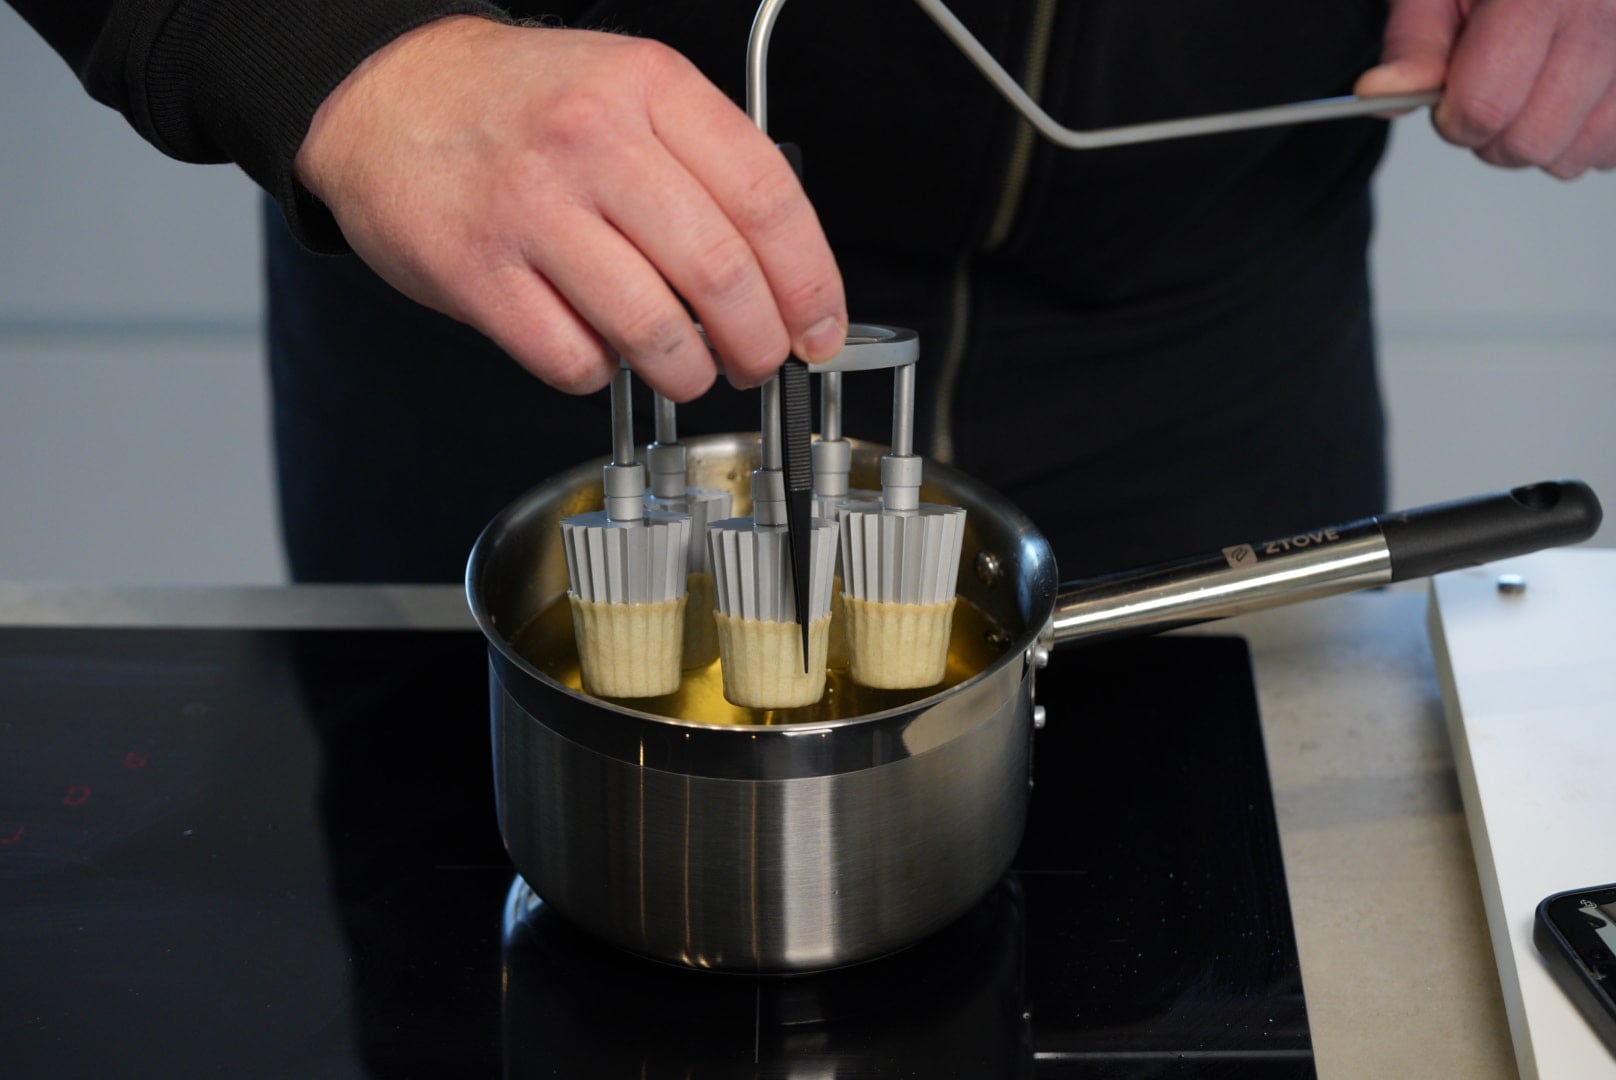
Step 6:
Release and Finish with Precision
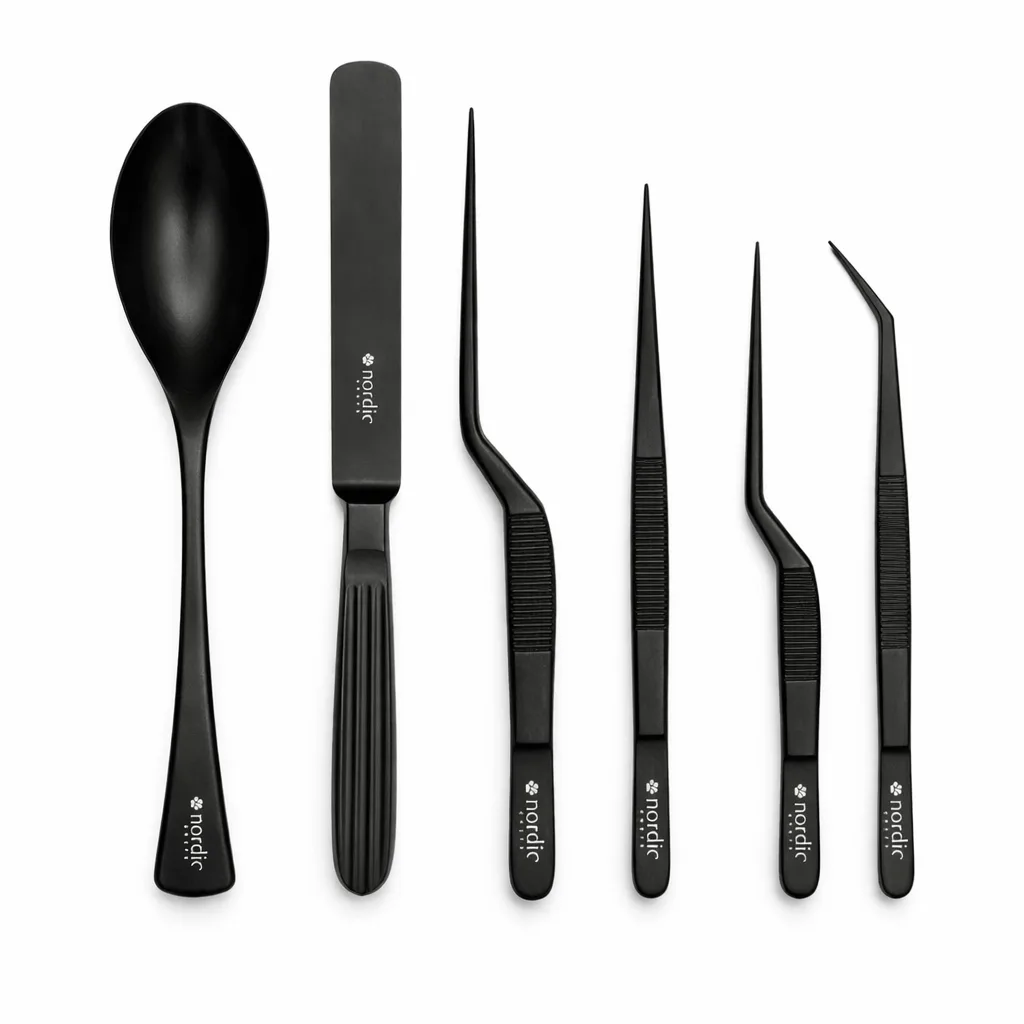
Once the croustade starts to hold its shape and take on color, gently release it from the mold using professional plating tweezers.
Let it float in the oil, and finish the final crisping manually. Lightly dip and turn it to ensure even texture across the entire surface.
This final step is where you control the last 20% — the difference between good and precise.
Final Thoughts
By focusing on heat, timing, and small adjustments, you can turn a simple technique into a reliable part of your workflow.
For service and plating, using dedicated stainless steel finishing trays for professional kitchens helps maintain structure and presentation
To improve both speed and consistency in service, explore our full range of professional croustade irons designed for modern kitchens.
Check out our michelin bunuelos recipe from chef Eric Vildgaard or our recipe for our crispy Monaka shells

